Instruction
for installing the VGA card in the JPEG2000 Digital Video Recorders
First
press the menu button on the DVR to stop the recording.

Failure to stop the DVR from recording / writing to the Hard Drive by
pressing the MENU button may cause damage to your HD when you power down.
Always stop the recording before powering down the DVR!
Power the unit down with the switch on the back.
Unplug the Power cord.
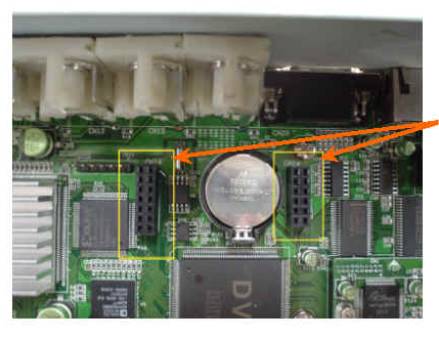
Look for the round silver battery
near the back of the DVR.
Notice the two sockets on either side of the battery.
Notice that the two sockets are different sizes. One has more holes then
the other.
The two arrows below point at the two sockets.
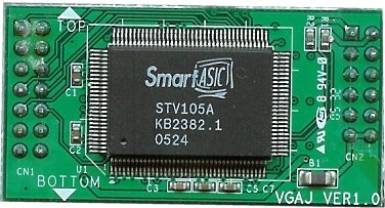
Notice the VGA card has TOP and BOTTOM with arrows on the card to guide
you.
When installed in the DVR the TOP should be pointing at the back of the
DVR.
The BOTTOM should point at the front of the DVR
Notice that there are more pins on the left-hand of the card just like the left
socket shown above.
Notice there are less pins on the right-hand of the card just like the right
socket shown above.
Line up the pins on the card with the pins on the DVR and push down firmly.
Plug
the power cord back in. Turn on the power button to power up / start the
DVR
Once the card is installed and the power is back on you can go into the DVR
menus to
set the resolution.
Press the MENU button on the DVR unit, LOGIN using your password (No
password by default)
Use the down arrow to move the onscreen curser over the DISPLAY SETUP option, Press the ENTER button
Move the curser over the MONITOR SETUP option, Press ENTER
Move the curser over the the VGA SETUP option and press ENTER
Move the curser over the VGA RESOLUTION option
Use the + (Plus) and the - (Minus) buttons to adjust the resolution
output of the DVR to match your monitor.
Call if you need help.